RabbitMQ First Hop #
For whatever reason, you have decided to jump into learning RabbitMQ. The RabbitMQ Website is a fantastic resource, but can be overwhelming as an introduction and difficult to extrapolate to your local system for further exploration. What follows is the introduction I wish I had when starting to learn RabbitMQ.
What We Are Going To Do #
- Preliminaries.
- Set up a RabbitMQ sandbox using Docker.
- Log into the RabbitMQ Admin.
- Write a Consumer (receives messages) in JavaScript.
- Write a Producer (sends messages) in Elixir.
- Send our first message.
1. Preliminaries #
You should have some comfort with the terminal. All examples here were created from a Mac, you will need to adjust based on your OS.
We will need Docker, Node, and Elixir’s Livebook.
- If you don’t have Docker installed, you should do that now Docker Desktop.
- If you don’t have Node installed, you can follow one of the options here: Nodejs.org.
- If you don’t have Elixir/Livebook installed, you can follow one of the options here:
Livebook Installation. If you don’t need Elixir on your system, you will want to use the Docker option. If you already have Elixir installed, you can optionally just use
iexor create an.exsfile.
That’s all we need for the rest of this walk-through.
2. Set up a RabbitMQ sandbox using Docker #
$ docker run -d --rm --name rabbitmq -p 5675:5672 -p 15675:15672 rabbitmq:3.13-management
What we did #
We asked Docker to run the official RabbitMQ Container.
rabbitmq:3.13-managementis the name of the container we want to get from Docker Hub--rmflag tells Docker to remove the container when we stop it.-drun in ‘detached’ mode, so we don’t see all the logs in our terminal.--name rabbitmqis a convenience for now so we can find the container easily, but it is not necessary.-p 5675:5672 -p 15675:15672We have set the ports we use:external:internalThis is a convenience in case you have RabbitMQ running on your system for other reasons (work for example). This will also allow us to demonstrate how to configure our connection regardless of which ports we may be using in the future.
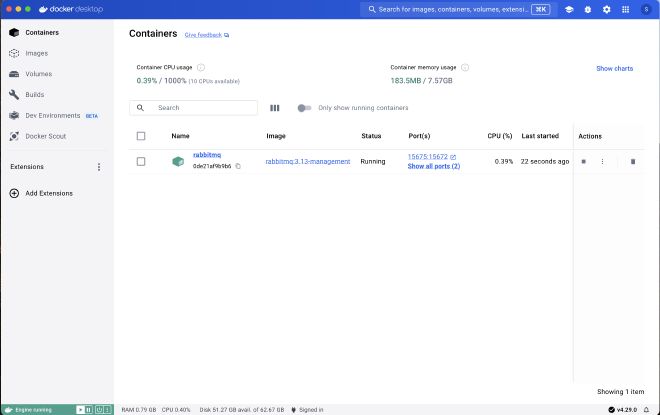
Assuming everything went well, you should see your new and running container in your Docker Desktop.
3. Log into the RabbitMQ Admin #
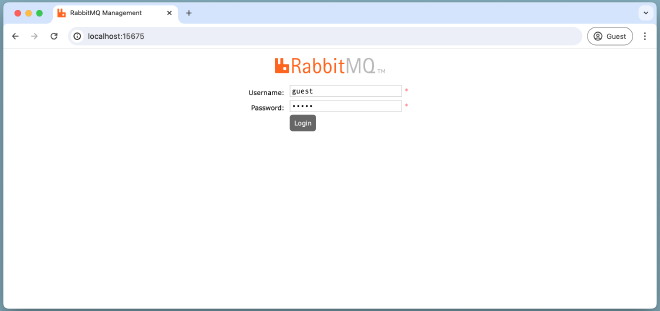
With our RabbitMQ container still running, go to localhost:15675 and log in with the default Username (“guest”) and Password (“guest”).
Once you are logged in you will see the Overview Page.
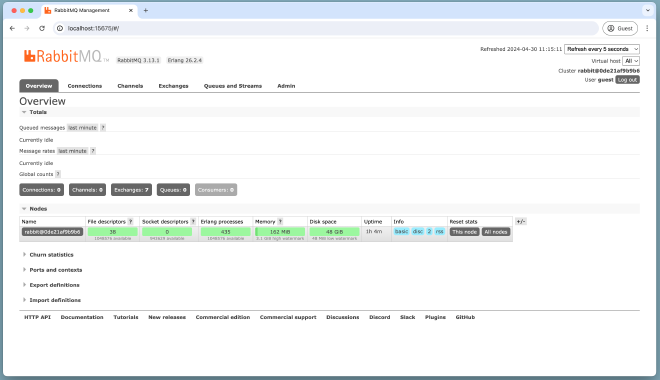
Don’t Panic!
If you are able to see something similar to the above image, you have done everything right and you are ready for the next step. This is your sandbox so feel free to play around and experiment with what is here. And because we launched this using the remove option in Docker, when we stop the container everything will be deleted. Run the Docker command again and you will have a fresh instance to play with.
4. Write a Consumer in JavaScript #
Let’s install the Node.js client library for RabbitMQ
npm install rabbitmq-client
We only have a single file to create, so wherever you like, save the following as consumer.js.
|
|
What we did #
- :3 require our AMQP library
- :5 connect to RabbitMQ on our custom port
- :9 we create (or confirm) the queue we want to listen to, “sneakers” in our case
- :13 we start consuming messages and print the ‘msg’ to the screen.
Run It! #
$ node consumer.js
And if everything is working you won’t see a thing :). No errors, but no output.
Let’s leave the console up running while we create some messages for this consumer to consume. We will come back to this later.
5. Write a Producer in Elixir #
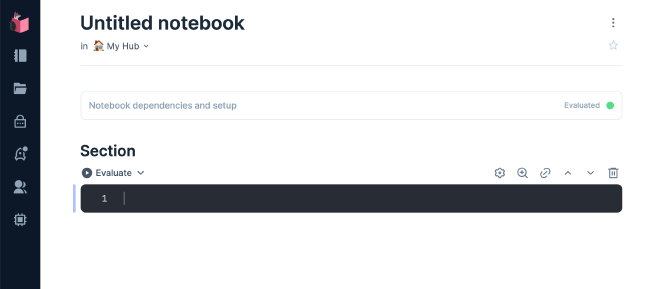
Let’s get to work and open Livebook. We will start by clicking the big “+ New notebook” button.
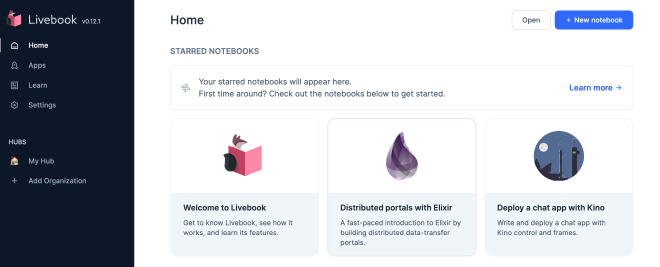
And you should have a brand new empty project page.
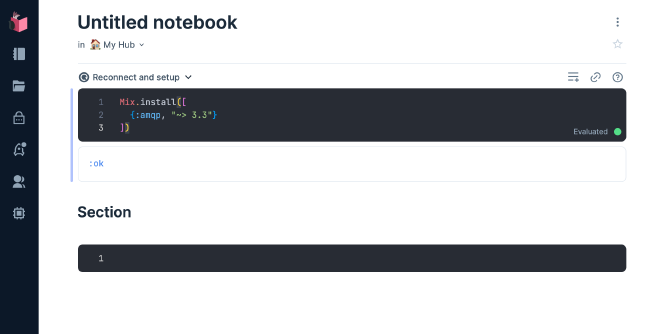
Hover over “Notebook dependencies and setup” and add our :amqp dependency.
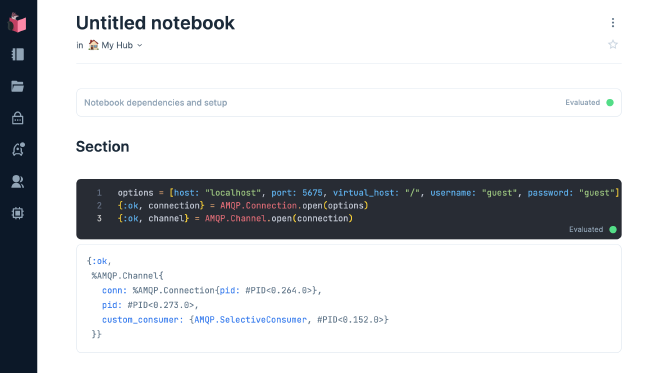
Next we will add a section to take care of our connection
options = [host: "localhost", port: 5675, virtual_host: "/", username: "guest", password: "guest"]
{:ok, connection} = AMQP.Connection.open(options)
{:ok, channel} = AMQP.Channel.open(connection)
Notice that we create our options with a custom port and explicitly pass the username and password (we don’t need to pass the username and password, just shown here for completeness).
After clicking “evaluate”, our Livebook should look like this and confirm {:ok, ...} that we have an active connection.
Let’s make sure our queue exists (or make it if it doesn’t) by adding.
AMQP.Queue.declare(channel, "sneakers")

Our response is pretty interesting this time. Not only does our queue already exist, we see there is 1 consumer waiting for messages - our running consumer.js script.
6. Send our first message #
Let’s add this line to our Livebook and click “evaluate”
AMQP.Basic.publish(channel, "", "sneakers", "Setec Astronomy")
Our entire Livebook should look something like this!
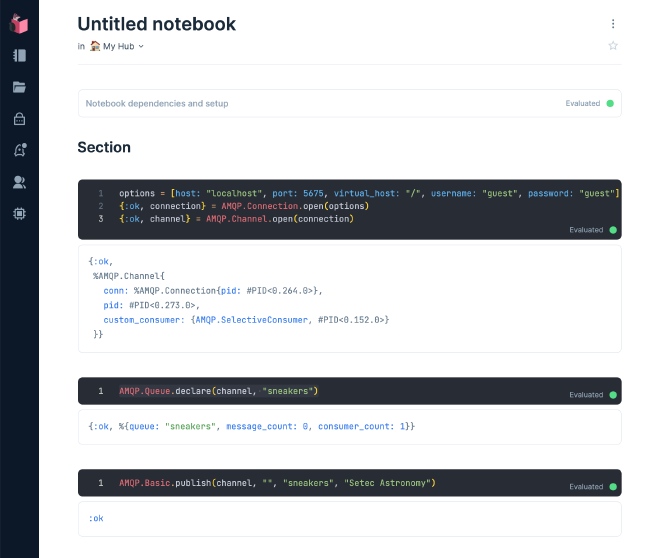
Once we evaluate that last entry in Livebook, our message (“Setec Astronomy”) will be routed through RabbitMQ’s to the Queue (“sneakers”) we designated. Since consumer.js was still running and connected the same queue, we should see the new message in our terminal!
$ node consumer.js
Setec Astronomy
What we did #
We wrote a little Elixir in Livebook that connected to RabbitMQ, established a connection, and sent a message to the queue of our choosing. We also saw the message we sent was received and displayed by the small JavaScript file we have running.
Of course we could get fancy and set up all kinds of ways to send multiple messages, but for our purposes lets just duplicate our previous entry, but change the actual message from “Setec Astronomy” to “too mAny Secrets”.
Once you evaluate the last Livebook entry you should see the new message show up in your console!
AMQP.Basic.publish(channel, "", "sneakers", "too mAny Secrets")
$ node consumer.js
Setec Astronomy
too mAny Secrets
🎉 Congratulations on finishing this walk-through 🎉
We have reached the end of this walk-through, but we are just at the start of learning RabbitMQ. Enjoy the journey!
What’s Next #
RabbitMQ has a lot to offer and there is a lot to learn. As a next step start playing around with what we learned. Here are some ideas…
- Implement a producer/consumer in your favorite language
- Run multiple instances of your consumer, what happens when you send a message?
- Find out how to configure RabbitMQ to deliver messages to some or all consumers.
- Now that you have a sandbox, work through the great examples at RabbitMQ Tutorials
Feedback #
I hope you found this post helpful. Feel free to DM on Twitter @mkumm or email me at mike @ mkumm.com with any feedback or questions.
Endnotes #
- The Consumer JavaScript file can be downloaded from Github consumer.js
- The producer Livebook can be downloaded from Github producer.livemd.
- The banner image was generated from Midjourney with the prompt “wide field with mountains in the background. A small factory in the distance. In the foreground are small bunny rabbits playing in the grass.” The image’s width was expanded with Adobe Photoshop’s Generative Fill Feature.